
RunPod have the cheapest offerings that I’ve found. There’s also Vast.ai but for some reason the miner doesnt start properly.
With RunPod you are renting a docker instance.
Table of Contents
- Sign up to RunPod
- Add account credit
- Generate SSH Keys
- Save your Privatekey
- The RunPod Bittensor template
- Connect to RunPod with PuTTy
- Hotkey / Coldkey Wallets
- Coldkey Wallet
- Hotkey
- Registration
- Hotkey registered
- Running a miner
- Discord
Sign up to RunPod
Add account credit
Visit Billing > Add an amount > Pay with Card
$100 in credit will cover about 10 days of mining.
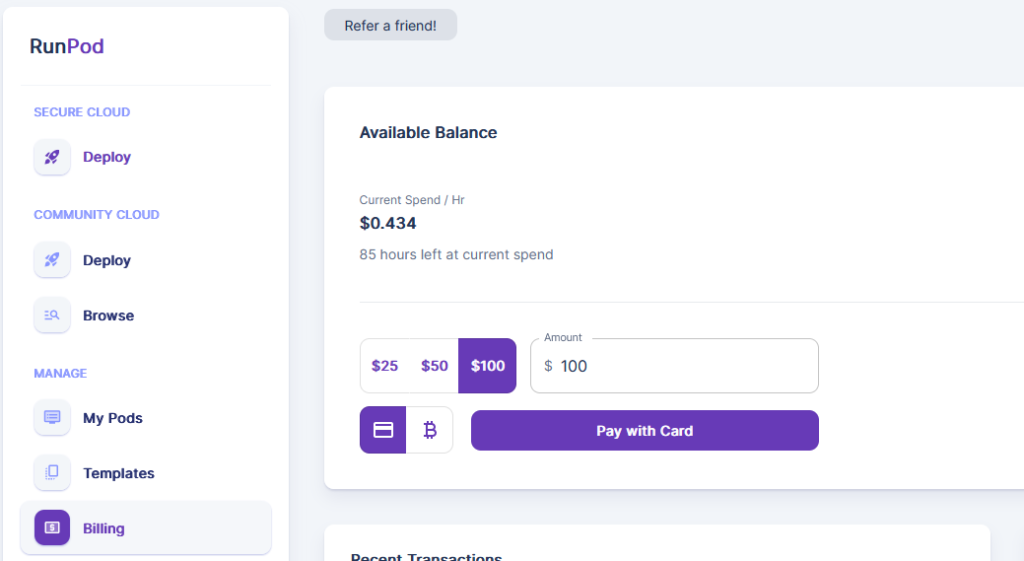
I like using an RTX A5000. The more powerful the card, the higher the Tao earnings will be.
At the time which I wrote this article the A6000 instance wasn’t available. RunPod are always updating their supply of GPU instances so when it comes back into stock, I will rent one.
Generate SSH Keys
In preparation of creating out RunPod instance and connecting via SSH, we must first create SSH keys as this is the only authentication method that is supported by RunPod. You cannot use passwords. Go ahead and add your public key under Settings > SSH Public Key. If you need help generating an SSH key, see below.
If you don’t have a public/private key, you can create one with PuttyGen. There’s a detailed guide here for generating SSH keys, but we will go over how to do it for RunPod specifically below.
Download
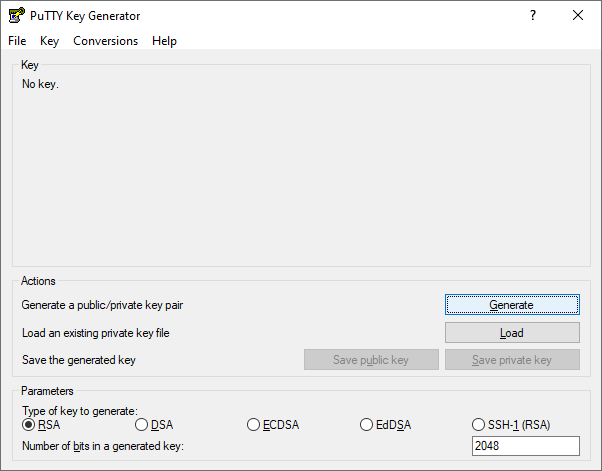
Firstly, get PuTTyGen here and run the executable
Generate your SSH Keypair
Click the Generate button to begin generating your public & private SSH keys (keypair)
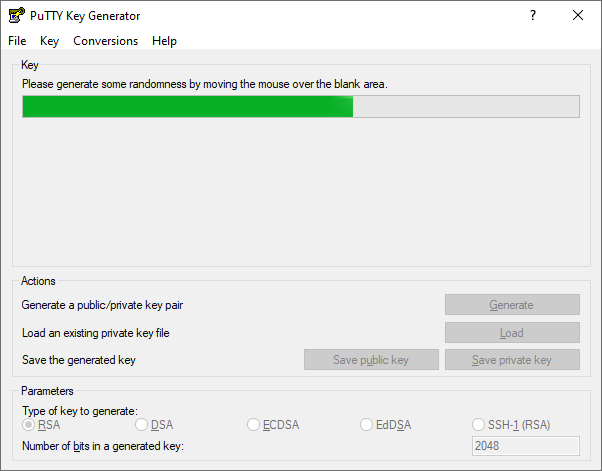
Move your mouse + tap random keys as per instructions
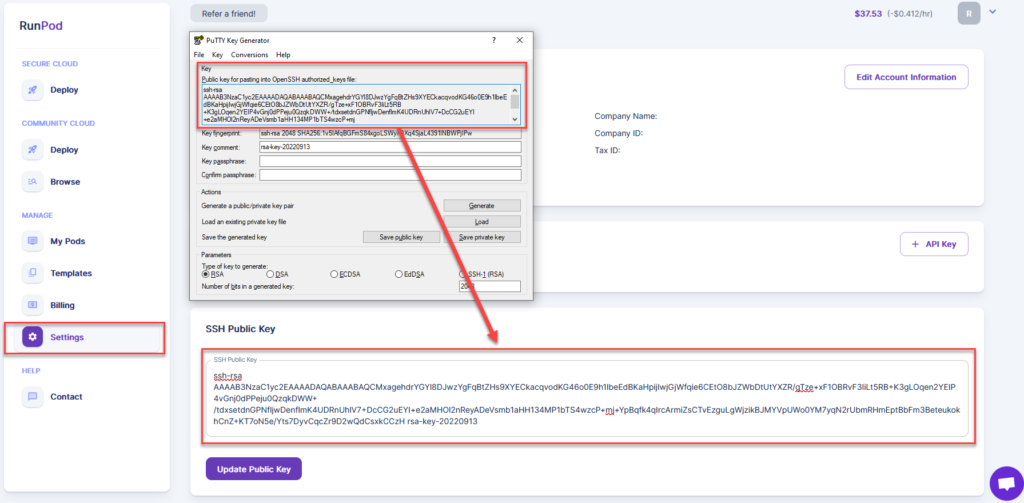
Your public key will be displayed in the PuTTyGen output box as pictured below.
You can now visit the RunPod Settings page, copy the PuTTyGen public key, then paste it into the RunPod SSH Public Key section
Save your Privatekey
From PuttyGen you can save your private key to your desktop. I recommend somewhere more secure, but for the sake of this tutorial let’s just place it on the desktop, giving it the name private.ppk
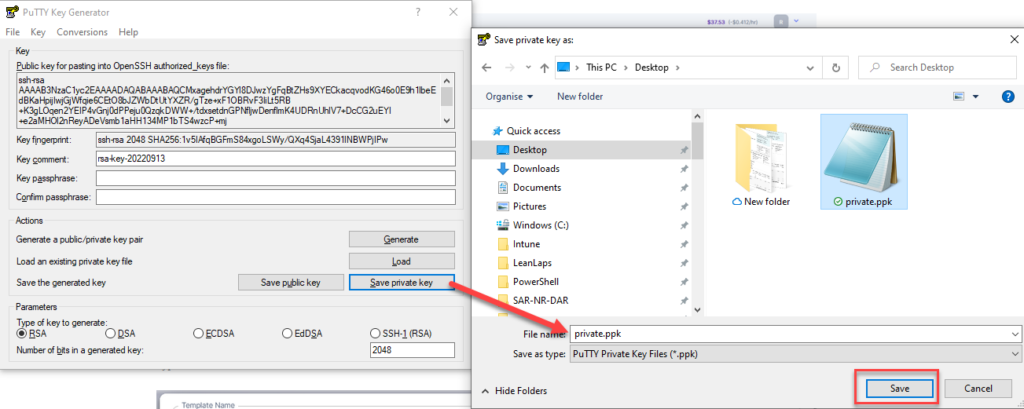
Now RunPod has your public key, and you have saved your private key to your desktop. We will reference the private key later.
The RunPod Bittensor template
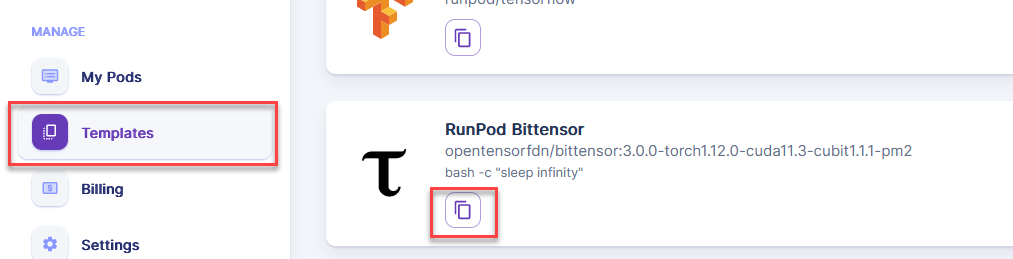
RunPod uses the Bittensor docker image template within its template library. We can copy the template to create & customize our own, using the below details.
Visit the Templates section, locate RunPod Bittensor and click the Copy button.
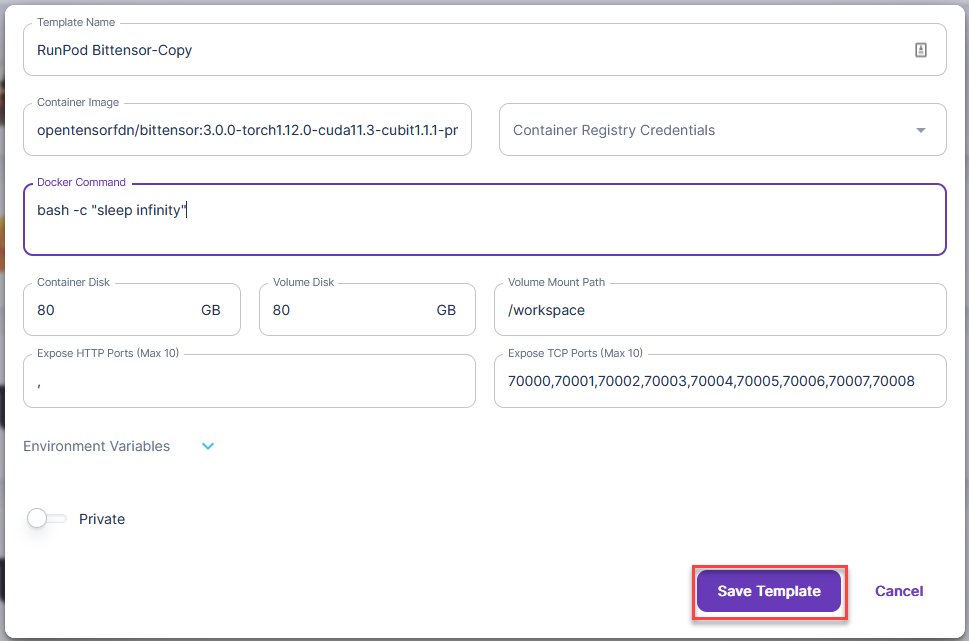
Now we have copied the Bittensor docker template and we are creating our own. Customize it below using the settings that I have shown.
Note that the ports listed under Expose TCP Ports (Max 10) are invalid ports, this is fine. Setting invalid ports here is a special function which RunPod needs to generate & open valid ones. We will see what ports it assigns us later.
Your volume mount path must remain as /workspace or your instance wont start up.
Save your template.
Now that the template is saved, visit the Secure Cloud section and choose an RTX A4000, RTX A5000 or RTX A6000. This guide was carried out with an A5000, but I would choose an A6000 if they are available.
Click Select for your desired GPU RunPod instance.

Select your custom RunPod bittensor template & adjust the container & volume disks to 80GB / 80GB. Click Continue when done.

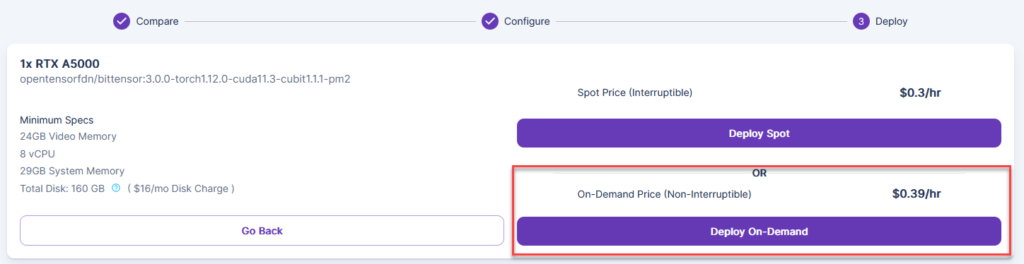
Select Deploy On-Demand.
Note: Choosing Spot means that your instance can be interrupted. We don’t want that.
Your instance is now starting up, click My Pods to check on it.
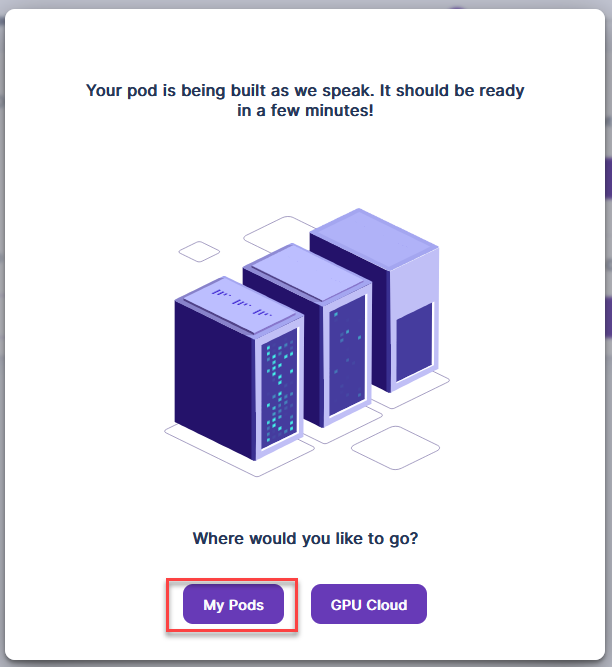
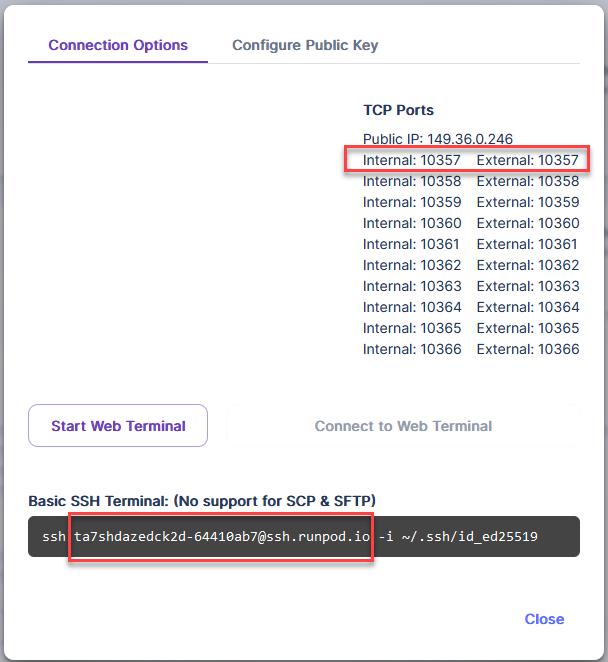
Once Running is visible up the top right of your pod, click Connect to see what your ssh username, IP and & TCP ports are.

RunPod Connection Details
Note down the SSH username, IP and the TCP ports.
The SSH Port will be 22.
Connect to RunPod with PuTTy
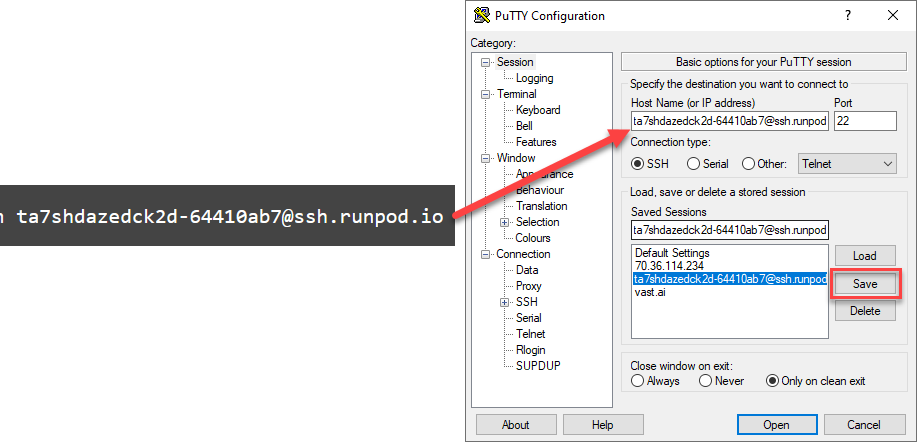
Enter the RunPod user & hostname, with port 22.
In my example, ta7shdazedck2d-64410ab7 is the username and ssh.runpod.io is the hostname. We will combine them.
For Host Name, enter ta7shdazedck2d-64410ab7@ssh.runpod.io & click Save to save the session
Add SSH Key to Putty
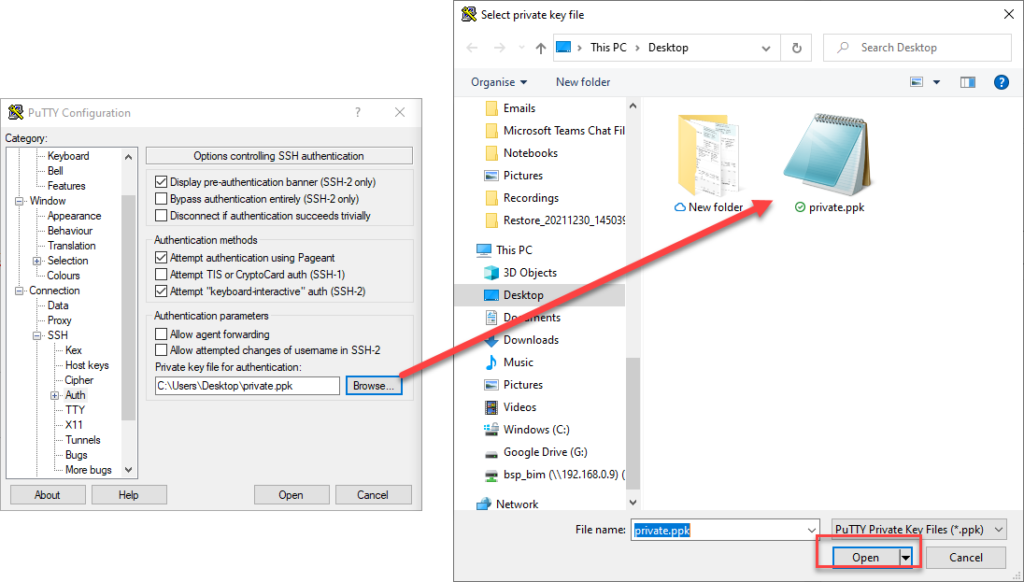
Now it’s time to reference our SSH private key that we saved to the desktop.
Within PuTTy go to Connection > SSH > Auth, browse for the private key file (private.ppk which was saved to the desktop) and open it. We will save the settings in the next step
Go back to Session > Click the saved session > Click Save
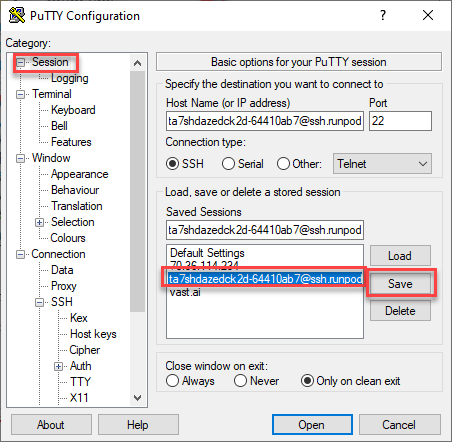
You can now click Open to connect to your RunPod
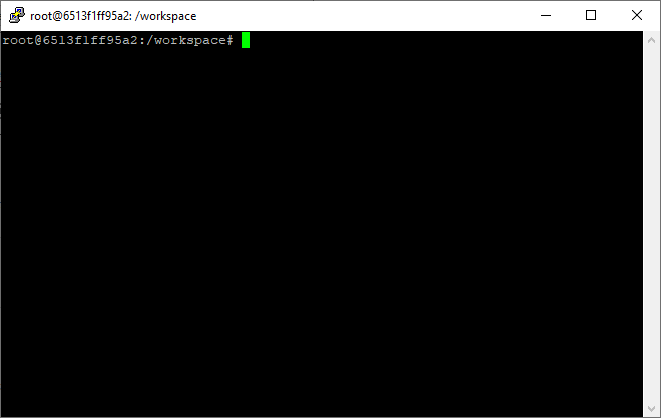
You are now connected to your RunPod docker instance.
Hotkey / Coldkey Wallets
Bittensor is installed within this docker RunPod image instance, so you are good to go with your commands.
Bittensor uses a Hotkey/Coldkey combination. A hotkey resides in a coldkey, a miner saves the Tao earnings to the hotkey.
Coldkey Wallet
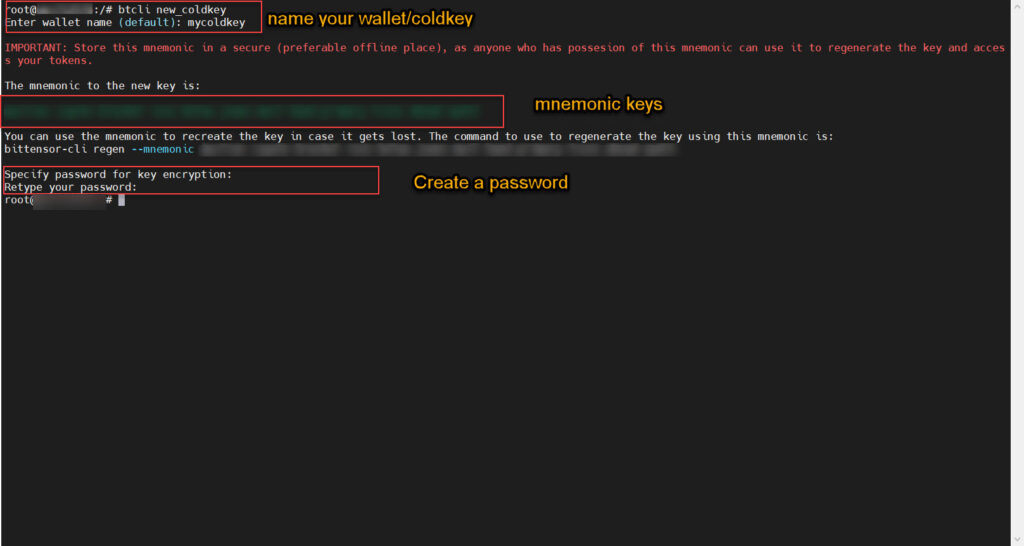
Let’s go ahead and generate our Coldkey
btcli new_coldkey- On the next line you specify the name. We gave it a generic name of mycoldkey. Call yours whatever you’d like.
- Take note of the mnemonic keys. You need this to recover your wallet. (Important: Do not lose or share these mnemonic keys. Keep track of this phrase. If you lose it, or it becomes compromised, you could lose all your Tao.)
- Specify a password
Hotkey
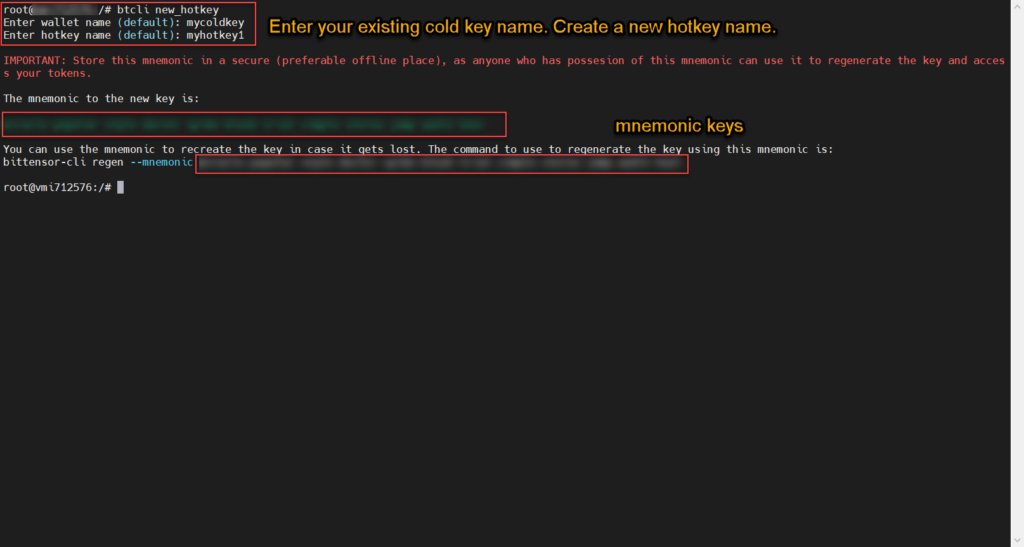
Now we can generate our Hotkey
btcli new_hotkey- On the next line you specify your wallet name (In the step above we called it mycoldkey)
- On the next line you specify the hotkey name. We can call it myhotkey1 (you may make more hotkeys later, whereas you will have only one coldkey)
- Take note of your mnemonic keys. you need these to recover your hotkey.
Registration
Using the command below, we will register a hotkey. --cuda.dev_id 0 refers to the first GPU. If you purchased additional GPUs within your RunPod, you could specify --cuda.dev_id 1 for the second GPU, --cuda.dev_id 2 for the third GPU and so on.
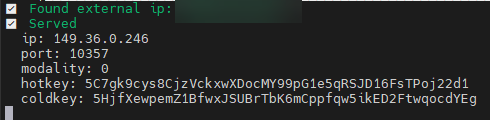
Notice the --axon.port 10357 flag. You will need to refer to the section RunPod Connection Details and alter the code below to specifiy one of the TCP ports you were assigned. Pick any TCP port.
You will have a different port assigned from what I have shown below.
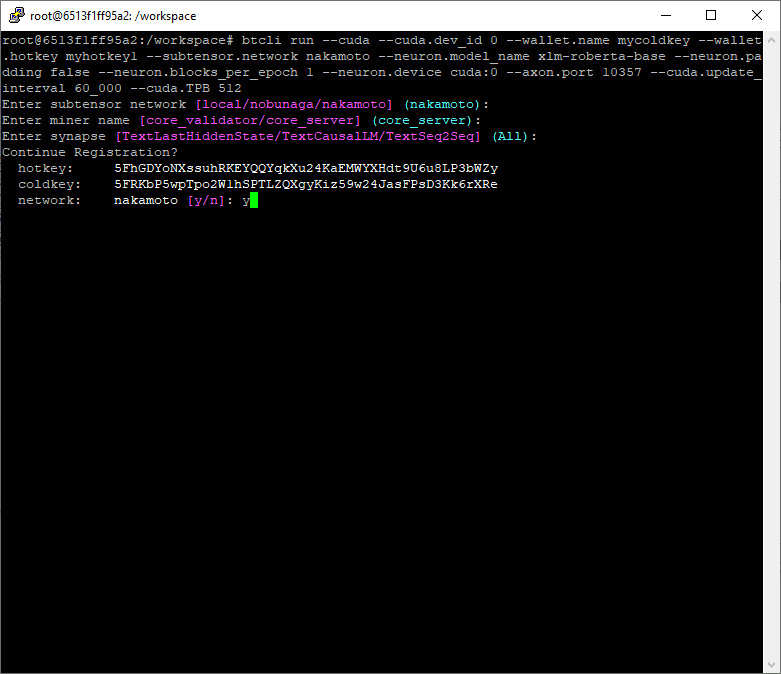
btcli run --cuda --cuda.dev_id 0 --wallet.name mycoldkey --wallet.hotkey myhotkey1 --subtensor.network nakamoto --neuron.model_name xlm-roberta-base --neuron.padding false --neuron.blocks_per_epoch 1 --neuron.device cuda:0 --axon.port 10357 --cuda.update_interval 60_000 --cuda.TPB 512Press Enter to all options to accept the defaults (in blue). You can also type in the options as I have shown below; either way is fine.
Enter subtensor network local/nobunaga/nakamoto: nakamoto
Enter miner name core_validator/core_server: core_server
Enter synapse TextLastHiddenState/TextCausalLM/TextSeq2Seq: All
Continue registration? Y (you must press Y, then Enter here. No input is not allowed)
The hotkey is now registering. It can take some time. Once the hotkey is registered you have 8 hours to begin mining otherwise you will be de-registered and will have to begin the registration process again.

Hotkey registered
The hotkey is now registered
You may need to press CTRL+C to stop the btcli run command now that the hotkey is registered.
Running a miner
We are going to use pm2 to run the miner using the recently registered hotkey, with some additional flags. Notice the --axon.port 10357 flag. Again, you will need to refer to the section RunPod Connection Details and alter the code below for the ports you were assigned.
pm2 start ~/.bittensor/bittensor/bittensor/_neuron/text/core_server/main.py --name miner --time --interpreter python3 -- --logging.debug --neuron.model_name distilgpt2 --neuron.padding false --neuron.blocks_per_epoch 1 --neuron.device cuda:0 --wallet.name mycoldkey --wallet.hotkey myhotkey1 --axon.port 10357 --subtensor.network nakamotoNow you can check the logs using pm2 logs
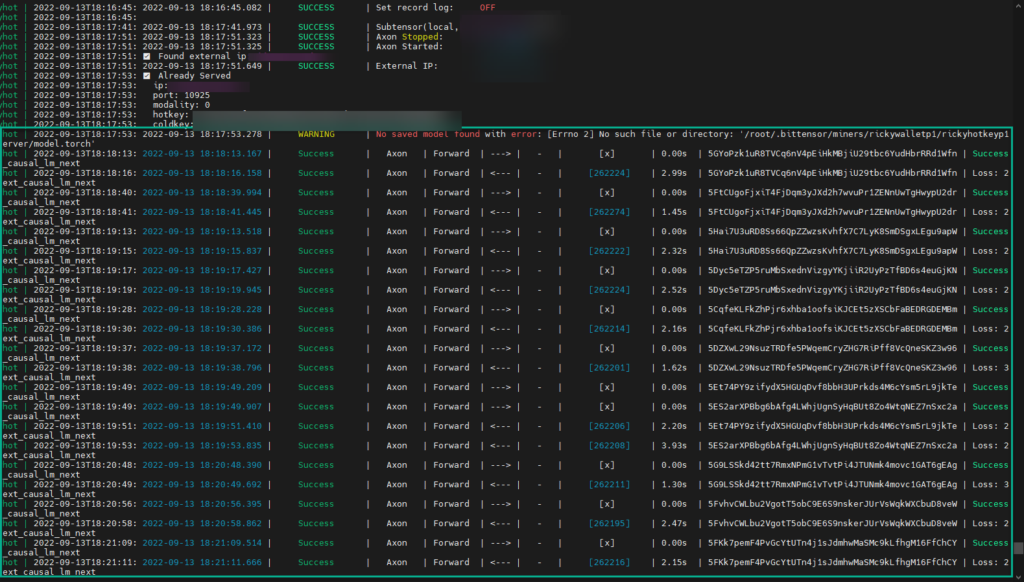
pm2 logsAnd successful output showing that the miner is working
You can check the status of your hotkey & earnings using the btcli overview command
btcli overview- Enter subtensor network: Press Enter or enter Nakamoto & press Enter
- Enter wallet name: mycoldkey or whatever you named your coldkey.

Then press Enter to accept the default network Nakamoto
Enter the wallet name myhotkey1 & press Enter
And you can see your Tao under the Stake column.

Discord
If you need any help, there is a very active Discord community found here: https://discord.gg/qasY3HA9F9
You can also drop me a comment via this blog post.

Hey Ricardo,
Tech semi-noob here. With no access to hardware other than an old Acer predator, would my best route be to sign up for the GPU alone and access via the laptop, or rent a CPU/server then rent the GPU on top of that and access it via the server. Thanks!
Hi Rob – now, I would recommend renting a GPU from RunPod (Vast.ai is an option in the future).
I havent found anywhere cheaper than RunPod. Dont even look at AWS, Google, Oracle etc. They will eat you alive.
Rent a single A5000, experiment, learn and then start earning. 1.5 Tao per day I get from my single A5000. I need to try custom tuning models but that is a massive GPU requirement which im not willing to invest in just yet.
Hi Ricardo,
I have not been successfull with A5000, the registeration of hotkey took way longer and was never successful. Would you recommend any other alternatives? i even tried to run with 2x A5000 but still was not successful. thanks!
Hi Harry. What MH/s were you getting? The difficulty changes depending on how many people are trying to register. Once I had to rent a 4x GPU RunPod and put 4 onto the job of registering. It took less than an hour. Have you checked the Discord channel ? https://discord.gg/8YjXrjKH
Hi Ricardo, thanks for your response! i am getting 5.9 – 6.3MH/s.. difficulty is 1T.. when i try with 2x, i notice that only one of the GPU is utilised to 100% whereas the otherone remains 0%.. is there anything that i can configure to make use of the both the GPUs?.. Also, may you please explain how did you do this – “Once I had to rent a 4x GPU RunPod and put 4 onto the job of registering” -> you mean, you had 4 different putty sessions trying to register?
Once again, appreciating your help so far.. very helpful
Pingback: How to set up a Bittensor Validator – Lost Cove
Hi Ricardo,
Appreciate your tutorial, step by step for newbies like me!
I ran into a problem after the registration.
My issue is after I insert the command, it gives me a value error: Unsupported type registry preset “metadata_type”
Appreciate if you could help me.
Have a great day.