This guide will show you up to set up a basic MySQL on AWS RDS.
Table of Contents
- Create an Amazon RDS Database
- Select MySQL
- Enter database details
- DB Instance Class
- Storage
- Availability & Durability
- Connectivity
- Password Authentication
- Additional Config
- Create database
Create an Amazon RDS Database
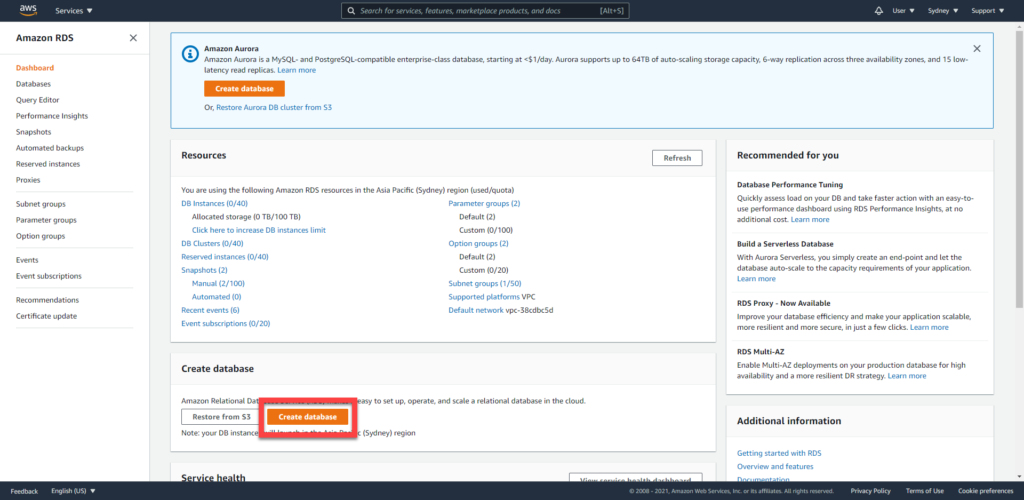
From the Amazon AWS RDS console, create a database
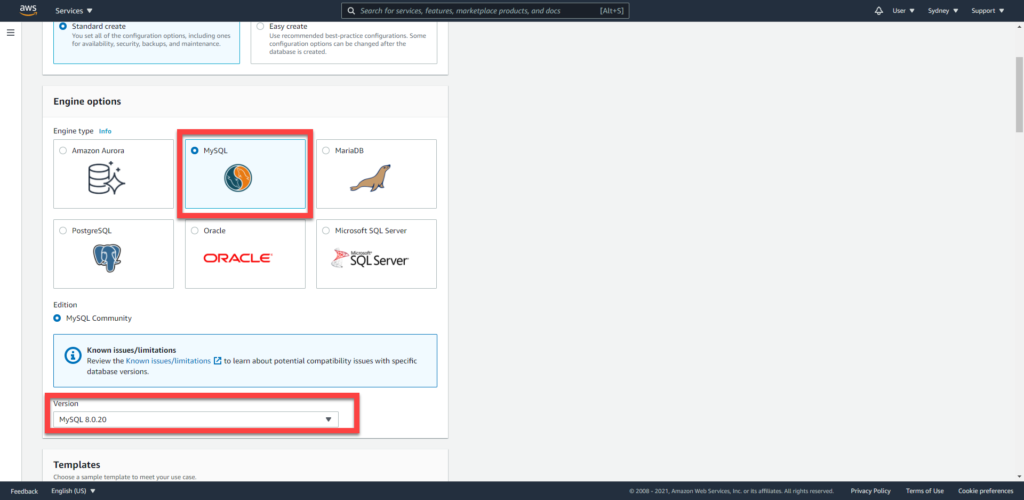
Select MySQL
Select the MySQL database option, then choose a version of MySQL.
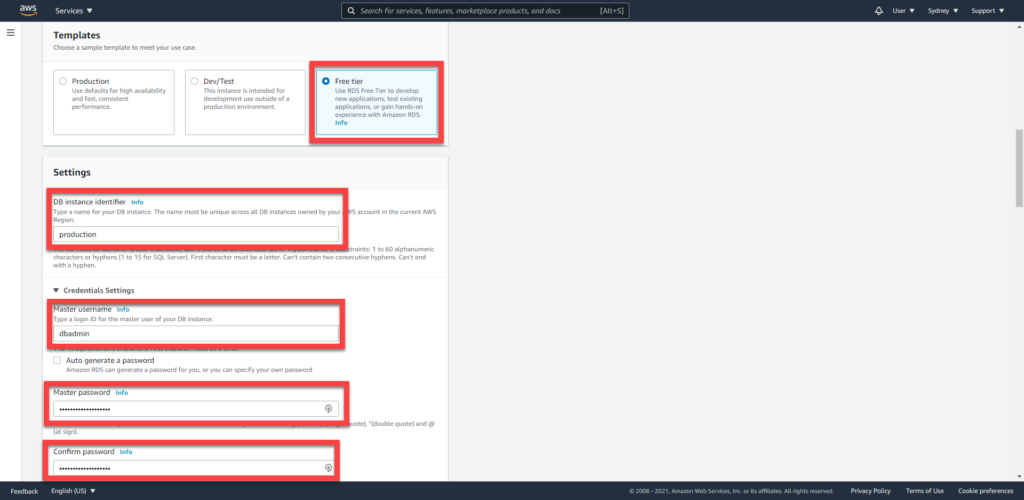
Enter database details
Enter a name for your database, then set a username + password for accessing it.
DB Instance Class
The database instance class can remain with the defaults.

Storage
Leave the storage as defaults. Optionally, you can turn off autoscaling if you don’t want the database to dynamically increase in size.
Keep in mind additional charges will come with an increased database size.

Availability & Durability
We’re not going to set up availability and durability for our database.

Connectivity
Leave as defaults.
If you will be connecting to the RDS database from within AWS, then you can choose No for public access. We will just set up public access for now, then lock it down later.

Password Authentication
For password authentication, we’re going to use the traditional method of user/password instead of Amazons access control.

Additional Config
Set a database name
Enable backups by ticking the checkbox and set a retention time to your choosing. We’ve picked 7 days.

Enable deletion protection, to prevent accidental deletes of the database.

Create database
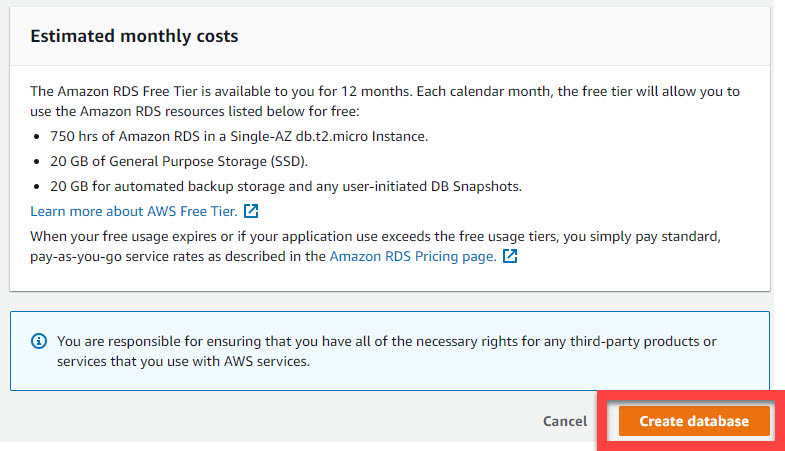
Now that the settings are specified, you can create the database.
Take note of the Hostname, Database Name, Username and Password.


Pingback: Install Traccar on AWS Docker with RDS – Lost Cove